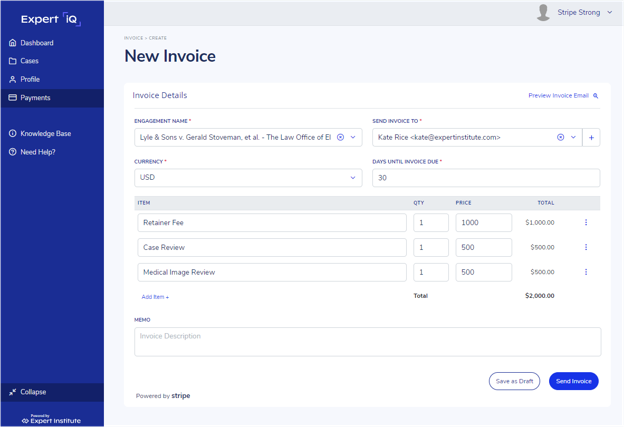
Creating an invoice is easy. You can launch the invoice form from your Dashboard, your All Payments page, or within a given Engagement detail page. If you come from an Engagement detail page, the Engagement name and primary contact will default into the form fields. Both fields can be overridden if necessary.
If you need to add an additional contact, you may do so by clicking the “+” sign in the “Send Invoice To” field. This will prompt you to enter a name and an email address. This contact information is saved for subsequent use within your invoicing workflow.
Clicking “Preview Invoice Email” will provide a sample of what your client will see when they receive your invoice email. PDF copies of the invoice are unfortunately not available at this stage of the draft invoice workflow.
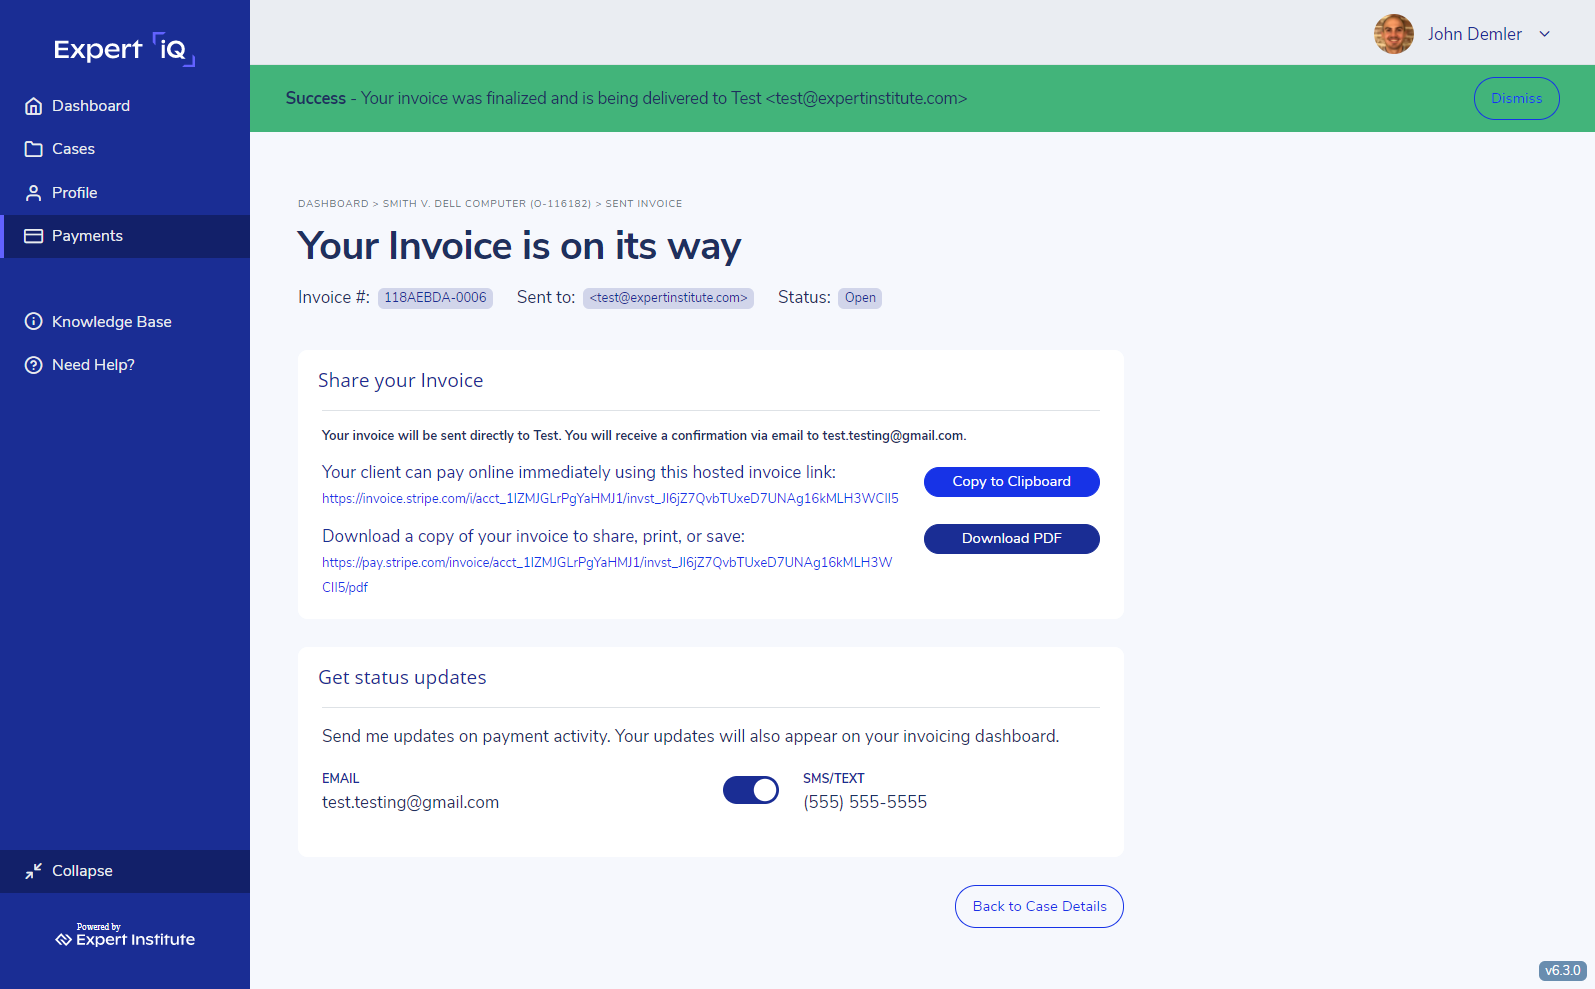
When you complete your invoice and hit “Send Invoice,” your client will immediately receive a copy of the invoice via email. Within the application, you will be directed to a success and confirmation page. This page includes information on your Invoice ID and provides URL links to the hosted invoice payment page and a download of your invoice PDF. A confirmation email will also be sent to you containing the same information. The URL link to the hosted invoice payment page can be useful if you need to remind your client where they can pay online, or if alternate contacts at your client’s firm require access.